Bone Carving
It’s December, 2005. I’ve been taking long multi-day hikes on many of the Great Tracks on New Zealand’s South Island, and I decide to take a break and do some traveling. Driving along the coast I came to the small town of Hokitika. It was raining the day I arrived, and raining the next day when I woke up. I thought I’d spend the day wandering around this small town.
Soon after I started walking around I passed the studio of a bone carver. This is a traditional art in New Zealand, and the people who do it for a living are very, very good. The owner of this studio was a master carver who opened up his facilities one day a month. People could come in, get some training, and then make their own pieces in his studio, using his tools, while Steve looked on, offered advice, and kept us safe. Steve’s assistant John took care of the more dangerous tasks involving powerful cutting saws.
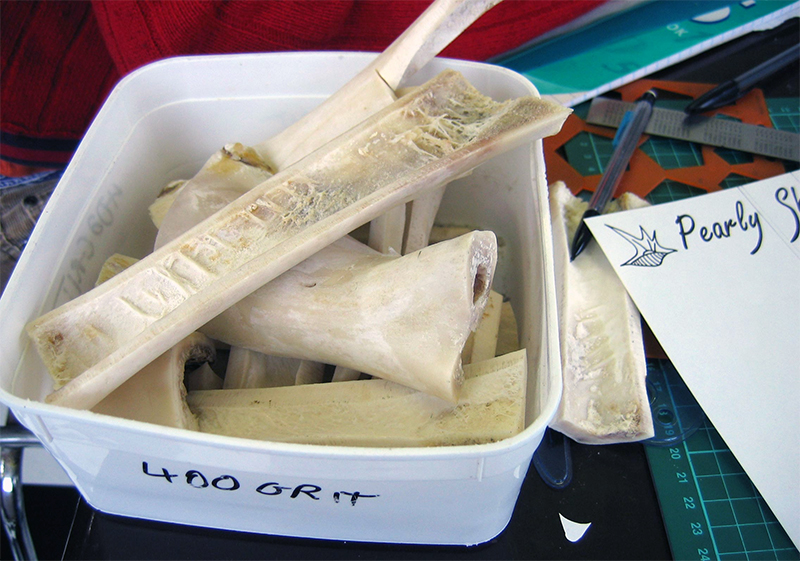 Here’s where it all began: a bunch of small cow bones in a tray. These bones had been cleaned and dried a long time ago. There are about 8 of us in the studio that day. Everyone else chose to work in jade, rather than bone. I could see why: jade is a beautiful, bright-green stone. But compared to bone, jade has a serious downside: it’s much more brittle. That means that when you cut it, you need to use wet saws and drills that get so hot so fast that you need to work under a constant stream of running water. This makes it harder to see what you’re doing. And because jade is so brittle, if you slip, you can easily break the piece you’re working on. Though bone lacks the gorgeous appearance of jade, it’s a much more forgiving medium. And frankly, I thought natural bone looked pretty darned good anyway. So I chose one of these pieces.
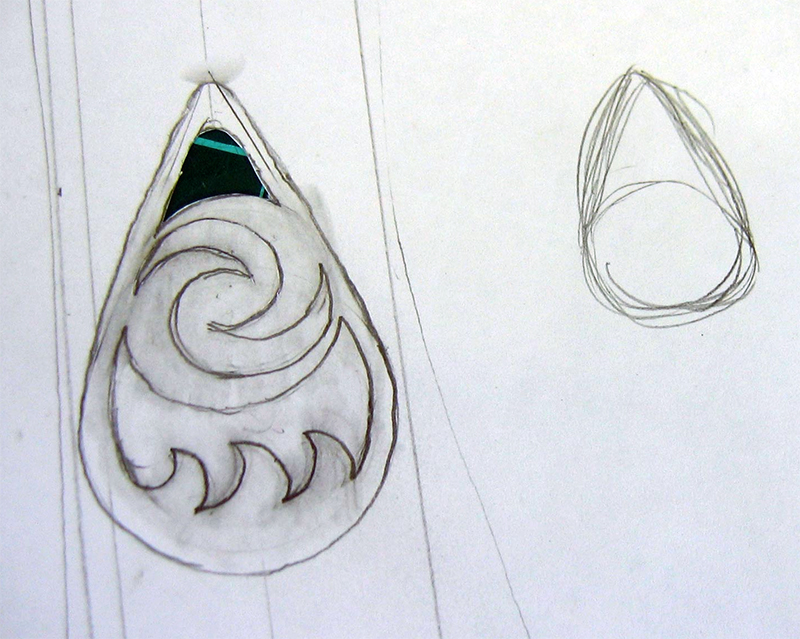 Now that I knew the maximum size of my piece, I designed it. I decided to make a pendant. I chose a teardrop shape because it would naturally hang properly. I wanted to represent the two natural elements that had most shaped my recent travels: the sun and the waves. I doodled a lot of different designs until I came up with this, which I liked enough to commit to. The first step was to cut it out of paper with an X-acto knife.
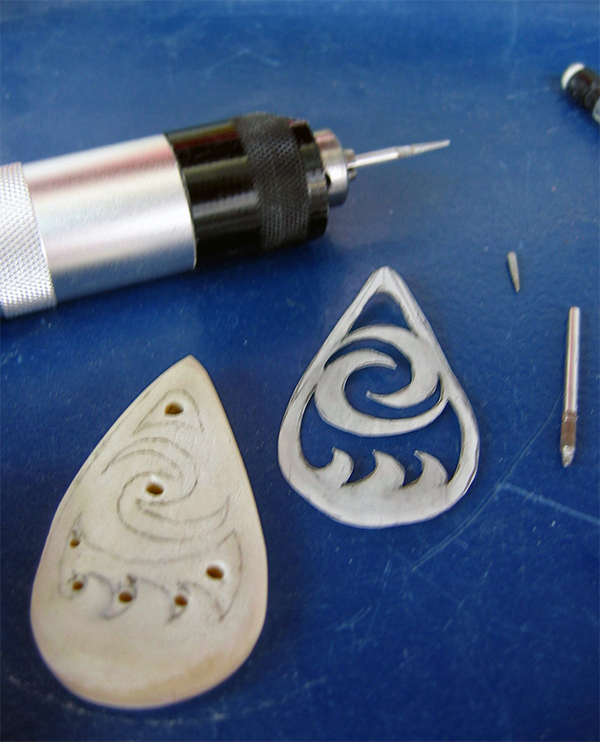 I used the paper to draw my pendant’s outline on my piece of bone, and Steve cut the basic form for me. Then I got to work in the day-long carving process. The first step was to draw the design on the bone using pencil. I had to keep the paper form handy, because the pencil marks frequently wore away and I had to refresh them. Using the drawing as a guide, I drilled holes through the regions that were to become void spaces. The idea is that I’d later be able to fit a saw blade into these holes, and then work the blade around to cut the empty spaces. The bone is quite thick, and the drilling work is tough. All of the power tools are controlled by a foot pedal, so you can adjust the speed to keep the bit from overheating or getting caught in the grit and dust that gets blown up everywhere. Nevertheless, even though you’re just drilling straight down, getting those holes made is tricky. If you bend or twist the drill a couple of degrees while you’re going, zing the bit will just snap. Here you can see that I’ve broken the bit on the drill. I felt terrible about it, until Steve reassured me that everyone breaks bits all the time. He just happily opened a drawer full of an enormous number of bits, popped in a new one, and sent me back to work.
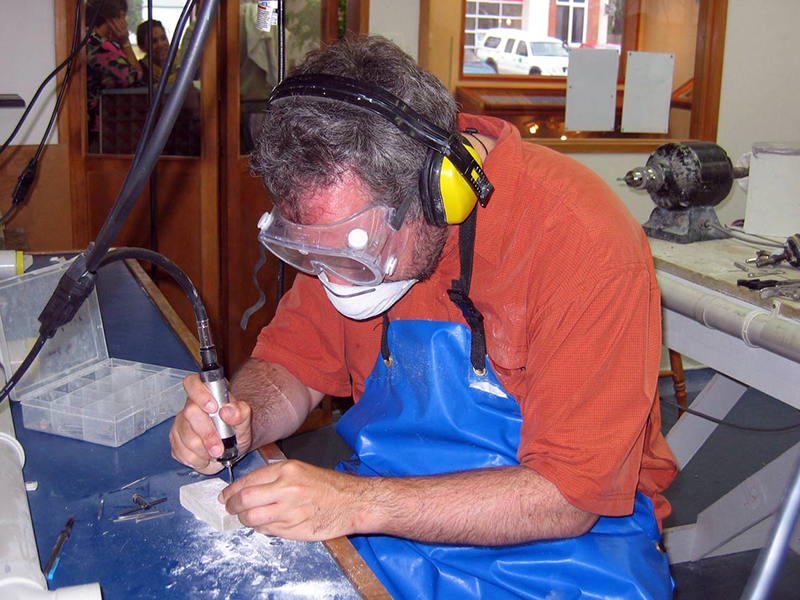 Bone carving is noisy, dusty, and loud. Steve had a boom box in one corner of the studio, cranked up high, but you could just barely hear it over the roar of the tools. The tools run at very high speed and the bone is a gritty medium, so there’s a lot of high-pitched squeals and whines as you work. In addition to my goggles and headphones (absolute necessities), I also had a face mask to prevent dust from going in my nose and mouth, and I wore a big smock to keep my shirt clean. The smock only kind-of worked; when you’re creating clouds of white dust you’re going to get some on you. But I was wearing one of my synthetic, quick-drying hiking shirts, so that night I just dunked it in water, smushed it up for a while, and hung it up to dry. In the morning it was good as new. The headphones weren’t as good as earplugs, but they were a big help when other people started grinding their jade, which creates a lot of high-pitched noise.
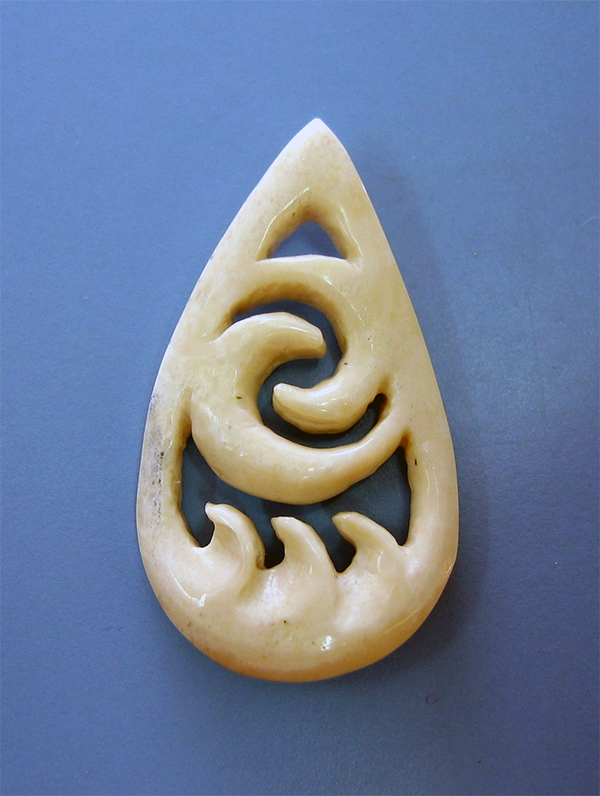 Once I’d removed the largest open spaces with the saw, I got to work on surface features. Although I hadn’t planned on it, as I was carving the basic form I thought it would be fun to scoop out the insides of the waves to give them more 3D shape. Steve was not a big fan of this idea, because he thought it would be all too easy for me to either slip when carving out these spaces, or mis-judge the bone density and snap off one of my precious waves. We talked about it for a while, and he agreed to help me do this safely. He showed me some cutting tricks, and kept a close eye on me, checking in frequently. When I was finished I was thrilled; shaping these waves was just a little thing but I thought it made the whole piece much better. Then I spent an hour or two rounding out all the edges with a series of sandpapers of ever-finer grit.
You can see a little discoloration on the left side of this image. That’s just the color of this piece of bone. It’s a feature!
I wore this pendant for the rest of my time in New Zealand, and for many months afterward. It still speaks to me of that beautiful place and the friendly people who helped me connect with it.
